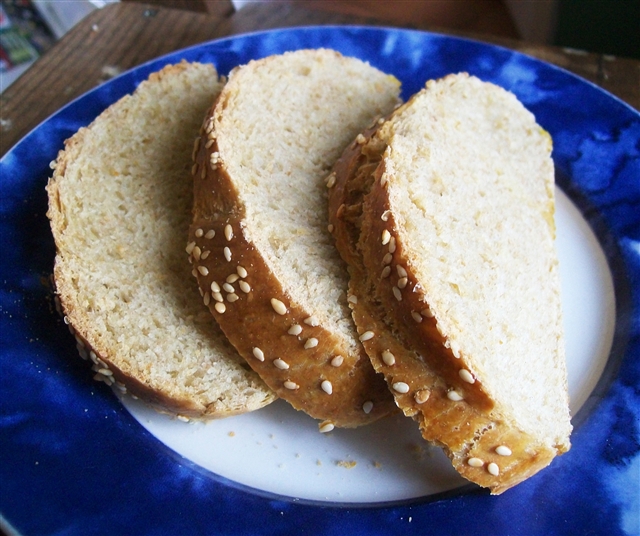
Is there anything more wonderful than hot, homemade bread, fresh out of the oven? This wholemeal spelt challah recipe is an old favourite of mine - it looks beautiful and tastes even better . . . crusty on the outside, soft on the inside. Challah is a traditional Jewish braided bread, but you can make the dough into loaves or bread rolls if you like. I use this basic recipe for all sorts of breads. Sometimes I leave out the egg and increase the water a little, but I do find the texture is softer with the egg, especially when using wholemeal flour.
I use my Thermomix for making bread, as you can grind the grain, add all the other ingredients, mix for a few seconds, knead for 2 mins, and the hard work's done! If you don't have a Thermomix, use wholemeal flour that's as fresh as possible, and mix the dough in a powerful food processor or a bread machine. (Or you can mix by hand, but you'll have to knead the dough for 10 to 15 minutes.)
If you want to make a double batch - two loaves - grind 250g of grain then set it aside and make two batches of dough using the recipe below, but use approx. 120g ground grain + 380g plain unbleached white spelt flour per batch.
You can of course change the grain to flour ratio depending on how heavy you like your bread.
I made a little YouTube clip to show you how to shape bread rolls and braid bread - it's easier to see it done than just read it and try and figure it out! (Please excuse odd camera angle - had no one to film it so had to use the iPad!) Here you go...
1. Weigh into Thermomix bowl and grind on speed 9 for 1 minute:
- 150g spelt grain
2. Add to Thermomix bowl:
- 350g unbleached plain spelt flour
- 2 teaspoons dry yeast
- 1 1/2 teaspoons fine sea salt
- 1 Tablespoon honey (optional)
- 40g melted butter/ghee or macadamia oil or olive oil
- 1 large (50g) egg (optional - makes a softer loaf)
- 210g lukewarm water *
* (Note: if leaving out egg, add 50g more water. If using a smaller or larger egg, adjust water accordingly, so that there is 260g of liquid altogether, with egg & water combined. )
3. Mix on speed 6 (medium speed) for 6 seconds, or until combined. Check dough - it should be soft and a little sticky. If your dough isn't a little bit sticky when making wholemeal bread, you'll end up with dry, crumbly bread. If necessary, add a little more flour and re-mix. Knead for 2 to 3 minutes in Thermomix on interval speed, until soft and stretchy.- 150g spelt grain
2. Add to Thermomix bowl:
- 350g unbleached plain spelt flour
- 2 teaspoons dry yeast
- 1 1/2 teaspoons fine sea salt
- 1 Tablespoon honey (optional)
- 40g melted butter/ghee or macadamia oil or olive oil
- 1 large (50g) egg (optional - makes a softer loaf)
- 210g lukewarm water *
* (Note: if leaving out egg, add 50g more water. If using a smaller or larger egg, adjust water accordingly, so that there is 260g of liquid altogether, with egg & water combined. )
[Note: If you are going to braid this bread, the dough will need a bit more flour - it won't keep it's shape if it's sticky.]
4. Wrap dough in silicon bread mat (or lightly oil large bowl, roll dough in oil, cover bowl with plastic bag) and leave to rise until doubled in size. (I place it in a cold oven, with a pan of hot water on the bottom shelf, and the warm, moist environment helps it rise. This way it only takes 15-20 minutes to rise.)
5. Punch down and shape dough. Dough will be quite sticky - add a handful or two of flour if you need to, but only add enough to be able to handle it - don't dry it out with too much flour.
For a braid: divide dough in three, and roll into equal length ropes, 2 to 3 cms thick. Pinch one end together, braid tightly, pinch other end together, tuck ends under and place on greased or papered tray. Repeat with other ball of dough. Once risen, brush with a mixture of:
- 1 egg & 1 Tablespoon water, beaten.
Sprinkle with sesame seeds.
For a regular loaf or rolls: Roll dough into a neat log and place in a bread tin, or shape into bread rolls. Brush bread (or rolls) with water, sprinkle with sesame seeds (opt).
6. Rise bread or rolls in a cold oven with the pan of hot water on the shelf underneath, for about 10 minutes for loaves, or 5 minutes for rolls. (Bread will finish rising during cooking time.)
7. After bread has risen a little, turn on oven to 200º C (180º fan-forced) and bake for 25 - 30 minutes, or until browned on top and slightly browned underneath. Bread should sound hollow when you turn it upside down and knock on it with your knuckles. If the top is brown but the bottom isn't, you can put it back in the oven upside down (on the oven rack) and give it 5 more minutes.
Note: Homemade bread is best eaten on the day it is made - the second day it is best toasted.
Crunchy on the outside, soft on the inside!


.jpg)


0 komentar:
Posting Komentar